
Stained concrete floors offer a remarkable way to transform your space into a work of art. By mastering the techniques and understanding the possibilities of stained concrete, you can create stunning floors that combine durability, design flexibility, and eco-friendliness.
One of the key benefits of stained concrete is its exceptional durability. Unlike other flooring options, stained concrete can withstand heavy foot traffic, making it ideal for both residential and commercial spaces. Additionally, stained concrete floors are resistant to stains, scratches, and UV damage, ensuring a long-lasting and visually appealing surface.
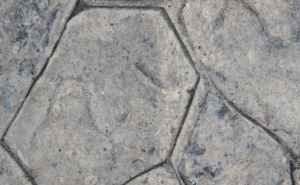
Another advantage of stained concrete is its versatility in design. With a wide range of colors and application techniques available, you can achieve various effects, from vibrant and bold to subtle and sophisticated. The unique chemical reaction between the stain and the concrete creates a captivating, vein-like pattern that adds character and depth to the floor.
Not only are stained concrete floors visually appealing, but they are also an eco-friendly choice. Since staining does not require the use of additional materials like carpets or tiles, it reduces waste and promotes sustainability. Additionally, staining allows you to repurpose existing concrete surfaces, minimizing the need for new construction materials.
In the forthcoming sections, we will explore concrete stain options, essential products and tools, application techniques, and maintenance practices that will help you master the art of stained concrete. Whether you’re a DIY enthusiast or a professional contractor, this comprehensive guide will equip you with the knowledge and skills to create magnificent floors that leave a lasting impression.
Stained concrete floors offer a multitude of benefits that make them a popular choice for homeowners and businesses alike. By mastering the art of stained concrete, you can transform your floors into stunning works of art. Here are some key advantages to consider:
1. Durability
Stained concrete floors are highly durable and long-lasting. When properly maintained, they can withstand heavy foot traffic, making them ideal for residential and commercial spaces alike. Unlike other flooring options, stained concrete does not easily chip, fade, or peel, ensuring your floors will retain their beauty for years to come.
2. Design Flexibility
One of the greatest advantages of stained concrete is its design flexibility. With an extensive range of colors, stains, and patterns available, you can achieve virtually any look or style you desire. From subtle hints of color to bold and vibrant designs, stained concrete allows you to unleash your creativity and personalize your space.
3. Eco-Friendliness
Stained concrete is an environmentally-friendly flooring option. Unlike other materials that require extensive manufacturing processes, such as hardwood or carpet, stained concrete utilizes the existing concrete slab, reducing waste. Additionally, water-based stains and sealers offer a more environmentally conscious alternative to harsh chemical-based products.
By embracing the benefits of stained concrete floors, you can create a visually appealing and sustainable environment. From its unparalleled durability to its versatility in design, stained concrete is a remarkable flooring choice that can elevate any space.
Concrete Stains Overview
When it comes to transforming your floors with stained concrete, understanding the different types of stains is essential. Two popular options are acid-based stains and water-based stains. Both types offer unique characteristics and applications, allowing you to achieve stunning results.
Acid-Based Stains
Acid-based stains create a chemical reaction with the concrete, resulting in rich and earthy tones. These stains penetrate the surface, creating a permanent color that won’t fade over time. The colors produced can range from subtle hints to vibrant hues, offering a wide palette to choose from. Acid-based stains also enhance the natural variations and textures of the concrete, giving your floors a unique and organic look.
One important consideration with acid-based stains is that they require careful application and protective measures due to the reactive nature of the chemicals involved. It’s crucial to follow a detailed instruction guide and wear appropriate safety gear during the staining process. Additionally, acid-based stains work best on smooth surfaces, so adequate surface preparation is necessary for optimal results.
Water-Based Stains
Water-based stains, as the name suggests, use water as the primary solvent. These stains offer a more environmentally friendly option compared to acid-based stains, as they emit fewer volatile organic compounds (VOCs) and have a milder odor. Water-based stains are generally easier to work with, making them suitable for both DIY enthusiasts and professionals.
The colors achieved with water-based stains are vibrant and can be customized by mixing different shades. They can be applied to both porous and non-porous surfaces, providing versatility in design options. Water-based stains are also known for their quick drying time, allowing for faster progress during the staining process.
Understanding the characteristics and applications of acid-based and water-based stains will help you choose the most suitable option for your concrete floors. Whether you prefer the dramatic reactions of acid-based stains or the convenience of water-based stains, mastering stained concrete opens up a world of possibilities for transforming your floors into unique works of art.
Concrete Product Essentials
To achieve professional results when staining your concrete floors, it is essential to have the right products and tools at your disposal. Here are some key items you’ll need for a successful concrete staining project:
1. Concrete Cleaner
A high-quality concrete cleaner is crucial for prepping the surface before staining. Look for a cleaner specifically designed for use on concrete. It will effectively remove dirt, oils, and other contaminants, ensuring a clean and porous surface for optimal stain absorption.
2. Concrete Stains
Choose the type of concrete stain that aligns with your desired outcome. Acid-based stains create unique and variegated patterns through a chemical reaction with the concrete. Water-based stains offer a wide range of colors and are more eco-friendly. Consider the effect you want to achieve when selecting a stain.
3. Staining Brushes or Rollers
Staining brushes or rollers are essential for applying the concrete stain evenly and smoothly. Brushes with natural fiber bristles often provide better results. Rollers are ideal for larger areas, ensuring consistent coverage.
4. Sealers
After staining, it’s crucial to apply a sealer to protect and enhance the appearance of the stained concrete. There are various types of sealers available, such as acrylic sealers or penetrating sealers. Choose a sealer that is compatible with the type of stain you’ve used and provides the desired level of sheen.
5. Protective Gear
Working with concrete stains requires taking precautions to protect yourself. Wear gloves, safety goggles, and a respirator to prevent any contact with harmful chemicals or fumes. It’s important to prioritize your safety throughout the staining process.
6. Tools for Surface Preparation
To prepare the concrete surface, you may need tools such as a pressure washer, scraper, or sander. These tools help remove any existing coatings, paint, or imperfections, ensuring a smooth and clean surface for optimal stain adherence.
7. Mixing Containers and Brushes
For preparing and blending the stains, you’ll need mixing containers and brushes. Use separate containers for each stain color, and ensure the brushes are clean to avoid any unwanted color mixing.
By having these concrete product essentials at hand, you’ll be well-equipped to tackle your staining project with confidence and achieve stunning results. Remember to follow the manufacturer’s instructions for each product and always prioritize safety during the process.
Application Tools and Staining Materials
To successfully achieve stunning stained concrete floors, you’ll need the right tools and materials. Here’s a comprehensive list of what you’ll need for the concrete staining process, along with some helpful tips for their proper use:
Tools:
1. Safety Gear: Don’t forget to prioritize safety. Get yourself goggles, gloves, and a respirator to protect yourself from any potential harm.
2. Pressure Washer: A pressure washer will effectively clean the concrete surface before staining, ensuring optimal stain absorption.
3. Concrete Cleaner: Choose a high-quality concrete cleaner to remove any dirt, grease, or stains from the surface. Look for a cleaner that is compatible with the specific stain you plan to use.
4. Broom and Scrub Brush: These tools are essential for scrubbing and prepping the surface, ensuring a smooth and clean foundation for the stain.
5. Sprayers: Depending on the size of the project, you can use both handheld and pump sprayers for applying the stain evenly.
6. Stiff Bristle Brush: A stiff bristle brush is handy for creating unique patterns or designs in the stained concrete. It can also help blend colors if desired.
7. Squeegee: Use a squeegee to spread the stain evenly across the surface, making sure there are no excess or uneven areas.
8. Roller: A paint roller can be used to apply the stain on larger, flat areas, ensuring a consistent layer of color.
Staining Materials:
1. Concrete Stain: Choose either acid-based or water-based concrete stain, depending on your desired color and effect. Acid-based stains create rich, earth-toned hues, while water-based stains offer a wider range of vibrant colors.
2. Neutralizer or Baking Soda: Acid-based stains require the use of a neutralizer or baking soda to stop the chemical reaction and stabilize the color.
3. Sealer: Applying a high-quality concrete sealer is crucial to protect the stained surface and enhance its durability. Opt for a manufacturer-recommended sealer suitable for stained concrete floors.
4. Clear Plastic Sheet: Covering the stained surface with a clear plastic sheet can help maintain the moisture required for proper curing.
5. Drop Cloths: Protect adjacent areas from accidental stain splatters or spills by using drop cloths or plastic sheeting.
6. Staining Pads or Brushes: Staining pads or brushes are ideal for detailed work or touch-ups, especially in corners or intricate patterns.
Remember to follow the manufacturer’s directions for each specific product and consult professionals if needed. With the right tools and materials, along with proper techniques, you’ll be well on your way to achieving beautiful stained concrete floors.
Step 1: Surface Preparation
Before diving into the exciting world of concrete staining, it’s essential to lay the groundwork by properly preparing the surface. This crucial step ensures optimal stain adhesion and long-lasting results. Follow these step-by-step instructions to achieve a clean and prepped concrete surface for the staining process:
1. Clear the Area: Start by removing all furniture, rugs, and any other objects from the concrete surface. This will provide you with ample space and prevent any hindrances during the preparation process.
2. Sweep and Vacuum: Thoroughly sweep the concrete surface to remove loose dirt, dust, and debris. Follow up with a vacuum to ensure a clean and dust-free surface. Pay close attention to corners and edges that may accumulate more debris.
3. Deep Cleaning: It’s crucial to ensure that the concrete surface is free from any oil, grease, or stubborn stains. Use a high-quality concrete cleaner to remove any contaminants. Follow the manufacturer’s instructions and scrub the surface with a stiff brush or a power washer if needed. Rinse thoroughly and allow the surface to dry completely.
4. Repair Any Damage: Inspect the concrete surface for any cracks, holes, or imperfections. If you come across any, use a concrete patching compound to fill them in. Smooth out the patched areas and let them dry according to the manufacturer’s instructions.
5. Smooth It Out: If the surface has rough patches or uneven areas, consider grinding or sanding those down to create a smoother canvas for the stain. This step will ensure an even and consistent application.
6. Protect Surrounding Areas: Take precautions to protect walls, baseboards, and adjacent surfaces from any accidental stain contact. Cover them with painter’s tape and plastic sheets to prevent any unwanted staining.
By following these surface preparation steps, you’ll establish an ideal foundation for the concrete staining process. A well-prepped surface guarantees better stain penetration, adhesion, and a visually stunning outcome.
Remember, patience is key during surface preparation. Take the time to thoroughly clean and repair the concrete, as this will contribute to the overall success of your stained concrete floor.
Step 2: Mark Off Specific Areas
When it comes to staining your concrete floors, marking off specific areas is a crucial step to ensure clean and distinct boundaries. By following these tips, you can create defined sections that enhance the aesthetic appeal of your stained floors.
1. Prepare the Surface:
Before marking off the areas, make sure the concrete surface is clean and free from any dirt, dust, or debris. Sweep or vacuum the floor to remove any loose particles.
2. Use Painter’s Tape:
Painter’s tape is an excellent tool for creating clean borders between different areas. It adheres well to the concrete surface and is easy to remove without leaving any residue. Apply the tape along the edges where you want to separate the sections.
3. Measure and Mark:
Take precise measurements to determine the size and shape of each area. Use a tape measure and a pencil to mark the lines for your desired boundaries. Take your time to ensure accuracy and symmetry.
4. Protect Adjacent Surfaces:
If there are adjacent surfaces, such as walls or baseboards, that you want to protect from staining, use additional painter’s tape or plastic sheets to cover them. This will prevent accidental stains and keep the surrounding areas clean.
5. Seal the Tape Edges:
To prevent the stain from bleeding under the painter’s tape, press down firmly on the edges to create a tight seal. This step ensures that the stain remains confined to the designated areas and produces sharp, well-defined lines.
By following these steps, you can effectively mark off specific areas on your concrete surface, resulting in beautifully stained floors with clean and distinct boundaries.
Step 3: Test Colors Before Application
Before applying the concrete stain on the entire surface, it is essential to test the colors on a small section of the concrete. Testing the colors beforehand allows you to see how they interact with the concrete and ensure that you achieve the desired outcome. Here are some guidelines to perform color tests effectively:
1. Select a Testing Area
Choose a discreet spot on the concrete surface, such as a corner or an inconspicuous area, to perform the color test. This will allow you to assess the color without compromising the overall appearance of the stained concrete floor.
2. Prepare the Concrete Surface
Clean and prepare the selected testing area by removing any dirt, dust, or existing sealers. Ensure that the concrete is in its raw state, without any previous stains or coatings, for accurate color representation.
3. Apply the Test Stain
Using a small brush or sponge, apply a thin layer of the concrete stain to the testing area. Follow the manufacturer’s instructions regarding application techniques and drying time.
4. Assess the Color
Allow the stain to dry completely. Observe the color closely in different lighting conditions, such as natural light and artificial lighting. This will help you evaluate how the color appears in various settings.
5. Make Adjustments if Needed
If the test color does not match your expectations, you can make adjustments by applying additional coats or experimenting with different stain colors. Keep in mind that the final result may vary depending on factors such as concrete porosity and surface quality.
By conducting color tests before the full application, you can avoid unpleasant surprises and ensure that the stained concrete floor meets your aesthetic preferences. Take the time to test different colors and find the perfect combination that will elevate the overall look of your floors. Remember, the goal is to achieve a vibrant and cohesive appearance that enhances the beauty of your space.
Step 4: Apply the Concrete Stain
Applying the concrete stain is a crucial step in achieving the desired colors and patterns on your stained concrete floors. With the right techniques and attention to detail, you can transform your plain concrete into stunning works of art. Follow these guidelines to ensure a successful application:
Preparing the Surface
Before you start applying the concrete stain, ensure that the surface is clean and free of any debris. Sweep or vacuum the area to remove dust and dirt. If necessary, use a mild detergent and water to remove any stubborn stains or contaminants. Allow the surface to dry completely before proceeding to the next step.
Choosing the Right Technique
There are various techniques you can use to apply the concrete stain, depending on the desired outcome. Here are a few popular options:
1. Brushing or Rolling: This technique involves using a brush or roller to apply the stain evenly across the surface. It is ideal for creating a uniform color.
2. Spraying: Spraying the stain allows for greater control and customization. Use a handheld sprayer or a pump sprayer to apply an even coat of stain. This method is great for creating unique patterns or effects on the concrete.
3. Stamping: If you want to add texture or mimic the look of other materials like wood or stone, you can use stamping tools to imprint patterns on the stained concrete. Apply the stain over the stamped area for a realistic and elegant finish.
Achieving Desired Colors and Patterns
To achieve the desired colors and patterns, you can utilize the following techniques:
1. Multiple Coats: If you want a deeper or richer color, apply multiple coats of the concrete stain. Allow each coat to dry before applying the next one.
2. Layering Colors: Experiment with layering different colors of stains to achieve unique and dynamic effects. Start with a base color and then add accents or highlights using complementary shades.
3. Stenciling: To create intricate designs or patterns, use stencils with cut-out shapes. Place the stencil on the concrete surface and apply the stain over it for precise and detailed results.
Remember, it’s essential to work in small sections at a time to ensure consistent coverage. Take breaks between sections to avoid any overlap or uneven application of the stain.
Finishing Touches
Once you have applied the stain, allow it to dry according to the manufacturer’s instructions. This usually takes around 24 to 48 hours. Avoid walking or placing any furniture on the stained surface during this time.
After the stain has thoroughly dried, consider applying a sealant to protect and enhance the color of the stained concrete. Choose a manufacturer-recommended sealer and follow the instructions for proper application.
By following these tips and techniques, you can apply the concrete stain effectively and achieve stunning results. Get creative and transform your floors into beautiful masterpieces that will leave a lasting impression.
Remember, the success of staining your concrete floors greatly depends on proper surface preparation, choosing the right technique, and mastering the application process.
Step 5: Allow Full Drying Time
After applying the concrete stain, it is crucial to allow sufficient drying time before moving forward with additional steps or applying sealers. Allowing the stained concrete to fully dry ensures optimal results and enhances the longevity of your project.
Here are some key points to remember during this stage:
Patience is Key
Drying time for stained concrete can vary depending on several factors such as the type of stain used, humidity levels, and temperature. It typically takes around 24 to 48 hours for the stain to dry completely. However, it is best to follow the specific instructions provided by the stain manufacturer.
Avoid Premature Traffic
During the drying period, it is important to restrict foot traffic or any heavy objects on the stained concrete surface. Premature traffic can disturb the drying process and potentially ruin the finish. Place warning signs and barriers to prevent accidental footprints or damage from occurring.
Weather Considerations
If you’re working on an exterior project, keep an eye on the weather forecast. Avoid staining concrete surfaces when rain or extreme humidity is expected. Moisture can interfere with the drying process and affect the final outcome.
Additional Curing Time for Sealers
If you plan on applying a sealer to protect and enhance your stained concrete, allow an additional curing time as recommended by the sealer manufacturer. Sealing too soon can trap moisture and compromise the quality of the finish.
Remember, patience and allowing ample drying time will ensure the best results for your stained concrete project. Take the necessary precautions and don’t rush this crucial step. Once the concrete is fully dry, you can proceed confidently to the next stage of your transformation journey.
Step 6: Apply a Concrete Stain Sealer
To ensure the longevity and beauty of your stained concrete floors, it is vital to apply a concrete stain sealer. This protective layer not only enhances the appearance of the stained concrete but also shields it from daily wear and tear. Here are some key considerations and steps to follow when applying a concrete stain sealer:
Importance of Sealing
Applying a sealer to your stained concrete is crucial for several reasons. First and foremost, it provides a protective barrier against stains, moisture, and UV damage. The sealer acts as a shield, preventing any spills or dirt from penetrating the surface and causing permanent stains. Additionally, it enhances the color intensity of the stained concrete, making it appear vibrant and glossy. Moreover, the sealer helps to maintain the longevity of the stain by offering increased resistance to abrasion and foot traffic.
Choosing the Right Sealer
There are various types of sealers available for stained concrete floors. Two common options include acrylic-based sealers and penetrating sealers. Acrylic-based sealers provide a glossy finish and are best suited for indoor use. On the other hand, penetrating sealers seep into the concrete, offering long-lasting protection without altering the appearance significantly. Consider factors such as the desired level of shine, expected foot traffic, and the specific requirements of your project when selecting a sealer.
Application Steps
Before applying the sealer, ensure the stained concrete surface is clean and dry. Follow these steps for a successful application:
1. Read the manufacturer’s instructions thoroughly and gather all the necessary materials, including a roller or sprayer for application, a paintbrush for tight corners, and safety equipment like gloves and goggles.
2. Test a small inconspicuous area first to ensure compatibility and desired results.
3. Start by pouring the sealer into a paint tray or bucket.
4. Use a roller or sprayer to evenly apply the sealer on the stained concrete surface. Work in small sections to ensure complete coverage.
5. Use a paintbrush to reach areas that are difficult to access, such as corners and edges.
6. Apply multiple thin coats rather than one thick coat. Allow sufficient drying time between each coat as advised by the manufacturer.
7. Once the final coat is applied, allow the sealer to cure according to the manufacturer’s instructions before subjecting the stained concrete to regular use.
By following these steps, you can ensure that your stained concrete floors remain protected and maintain their beautiful appearance for years to come.
Do I Need To Hire a Professional to Stain A Concrete Floor?
Staining a concrete floor can be a rewarding DIY project, but it requires careful planning and execution. Whether or not you should hire a professional depends on your level of experience and comfort with handling the necessary tools and chemicals.
While hiring a professional can ensure a polished and flawless result, it comes with a cost. Professionals have the expertise and equipment to handle larger projects efficiently, saving you time and effort. They can also provide valuable guidance on color selection and application techniques, resulting in a more professional finish.
However, if you have some DIY experience and are willing to invest the time and effort, staining your concrete floor yourself is definitely possible. With proper research and the right materials, you can achieve impressive results comparable to those done by professionals.
Before embarking on a DIY staining project, consider the following:
1. Skills and Experience: Assess your level of expertise in working with concrete and handling staining chemicals. If you’re a beginner, it might be wise to start with a smaller area or seek professional advice.
2. Project Size: Consider the size and complexity of the project. Larger areas or intricate patterns may require professional expertise to achieve the desired outcome.
3. Time and Resources: DIY staining requires adequate time, patience, and access to the necessary tools and materials. Ensure you have the commitment and resources to complete the project successfully.
4. Risk Tolerance: Understand the risks involved, such as potential damage to the concrete or unsatisfactory results. Assess your willingness to take these risks and handle any complications that may arise.
Remember, proper surface preparation, color testing, and application techniques are crucial for a successful stained concrete floor. If you’re uncertain about any aspect of the process or prefer to leave it to the experts, consulting with a professional is always a wise decision.
Conclusion
In conclusion, mastering stained concrete floors opens up a world of possibilities for transforming your space. By following the techniques and tips outlined in this guide, you can achieve stunning and durable results that will enhance the aesthetic appeal and value of your floors.
Throughout the staining process, it’s important to remember the benefits of stained concrete. Not only are these floors highly durable, but they also offer design flexibility and are an eco-friendly choice. With a wide range of colors and methods available, you can create unique and personalized looks that suit your style.
To ensure successful results, proper surface preparation is crucial. Thoroughly clean and prep the concrete before staining to achieve the best outcomes. Testing colors before application is also essential to achieve the desired effect. Apply the stain carefully, using techniques such as layering and masking, to create various patterns and depth.
Allowing sufficient drying time is essential before applying a concrete stain sealer, which will protect and enhance the stained concrete for the long term. When it comes to maintenance, regular cleaning and periodic reapplication of the sealer will help to preserve the beauty of your stained floors.
Whether you choose to take on the staining process yourself or hire a professional, mastering stained concrete can be a rewarding endeavor. It offers endless design possibilities and a flooring solution that is both visually appealing and sustainable.
In summary, with the right techniques, colors, and maintenance practices, you can transform your floors into stunning works of art. Embrace the art of stained concrete and enjoy the unique and timeless beauty it brings to your space.